Day: June 5, 2017

  • Ecoprinting with Laura Dell’Erba – Viscose and Voile

    Ecoprinting with Laura Dell’Erba – Viscose and Voile

    Ecoprinting is a wonderful technique to dye fabrics with zero impact on the environment. What’s more, the results you can get with this dyeing method are truly astonishing. Indeed, because the leaves and the flowers are in direct contact with the fabric, the printed motives will be very crisp. If you haven’t tried ecoprinting yet, now it’s the time to do it!


    In Italy, the ecoprinting guru is our friend Laura Dell’Erba. We asked her to work with fabrics of plant and animal origin, specifically our viscose crepe voile and our silk cotton voile. Discover the results by reading this tutorial. I love it!

    Ecoprinting on viscose crepe

    For ecoprinting on fabrics of plant origin you do not need to use vinegar as you do for etamine, gauze and silk chiffon 6. Firstly, symmetrically fold the fabric into an accordion fold.


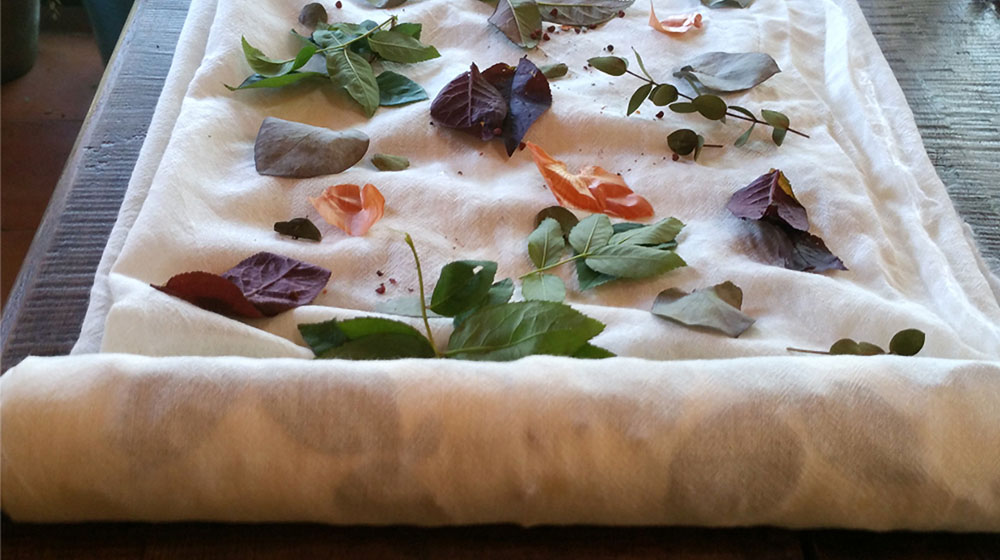
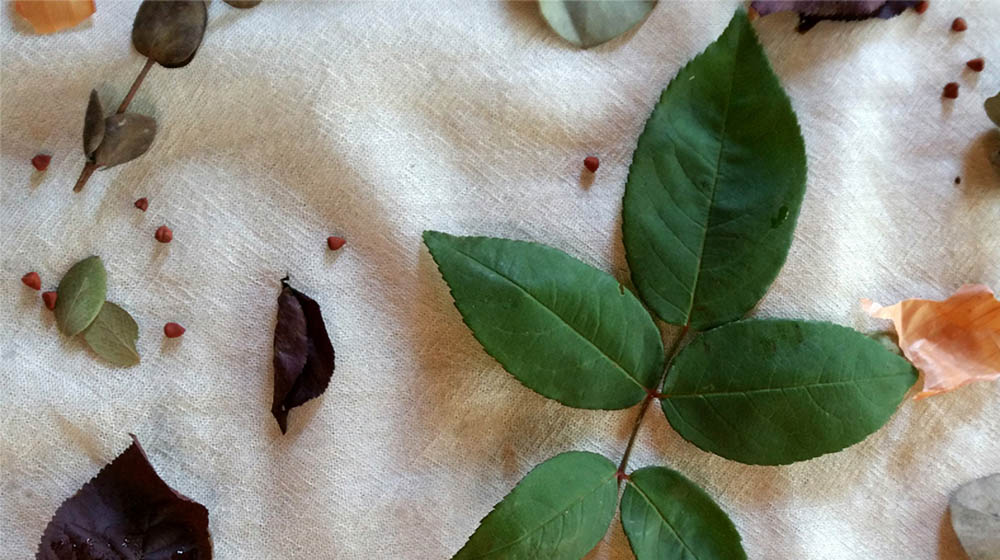
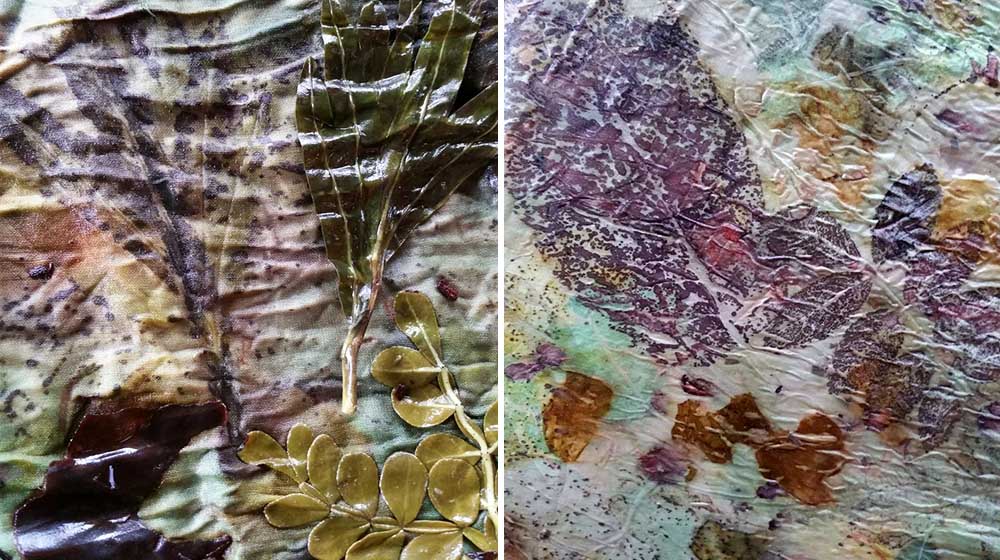
    Pick the leaves you wish to use and put them inside the fold. If you want a result that’s similar to mine, you can use leaves from chestnut tree, Norway maple, liquidambar, ailanthus and blackberry bush. You can also add some onion skin and sandalwood.

    Next, take an iron rod and wrap some cotton cloth around it, so that the fibers of the fabric you want to print will not get ruined. Start from the edge of the fabric and roll it up, carefully avoiding to create any creases.


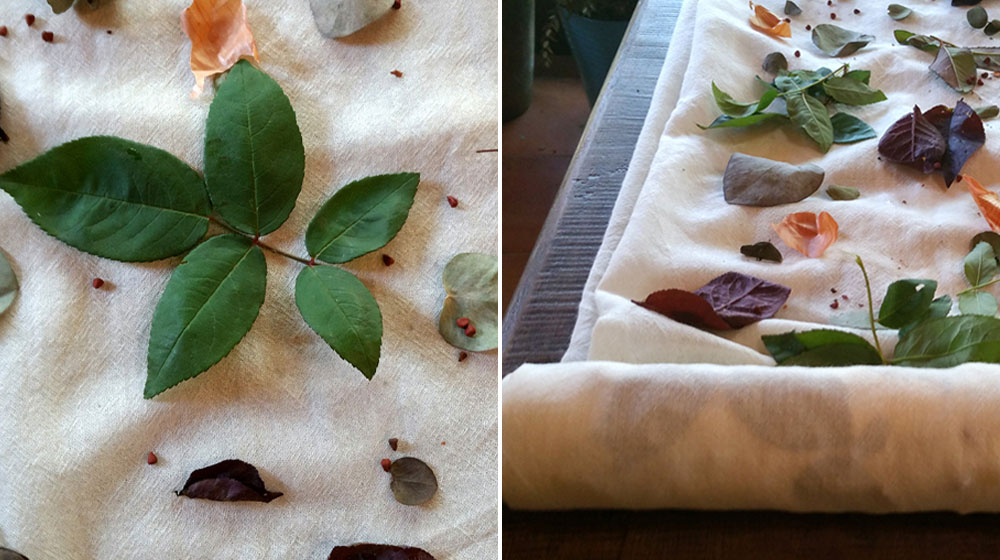
    Finally, close the roll on both sides and use some doubled kitchen twine to tie it up.

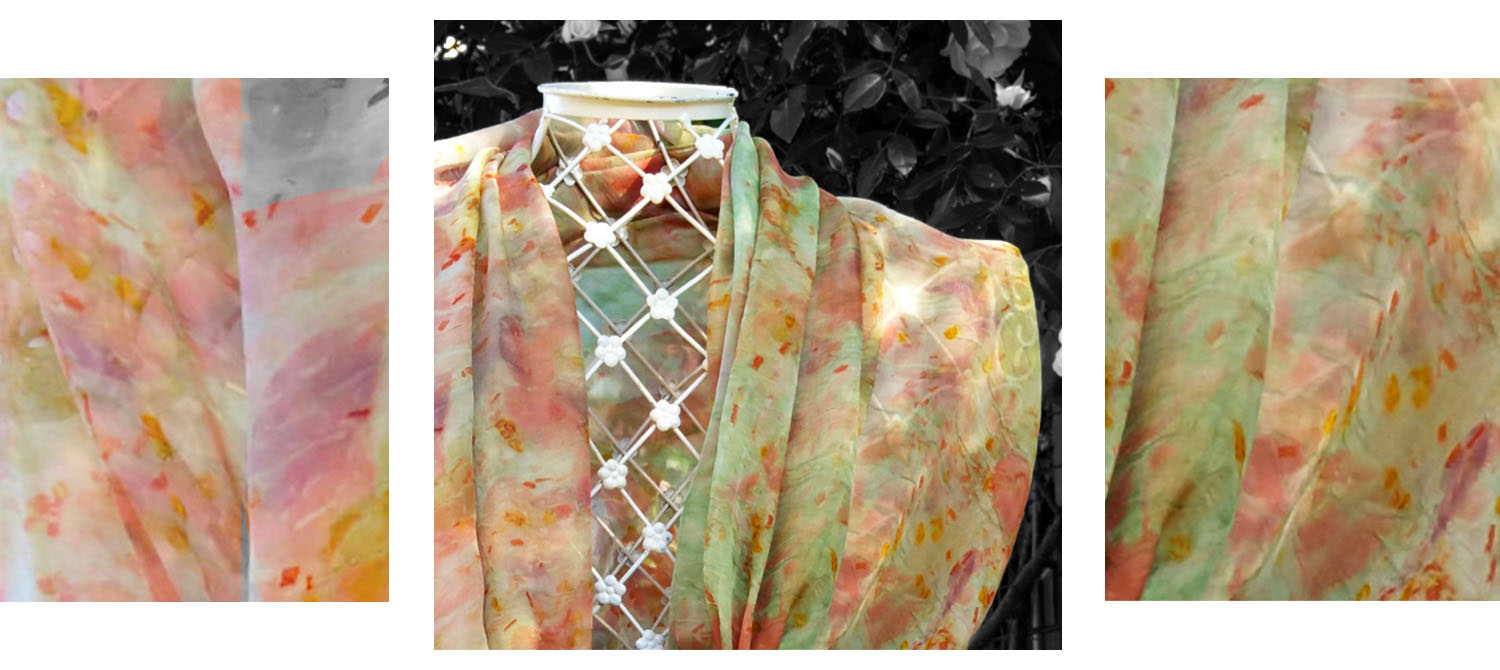
    After this, start mixing 3 grams of logwood extract into some cold water. Use a pot with a capacity of at least 25 liters and put the viscose crepe roll in it, with the mixture you have prepared. Keep in mind that it’s always best to cook vegetable fibers for at least one hour.


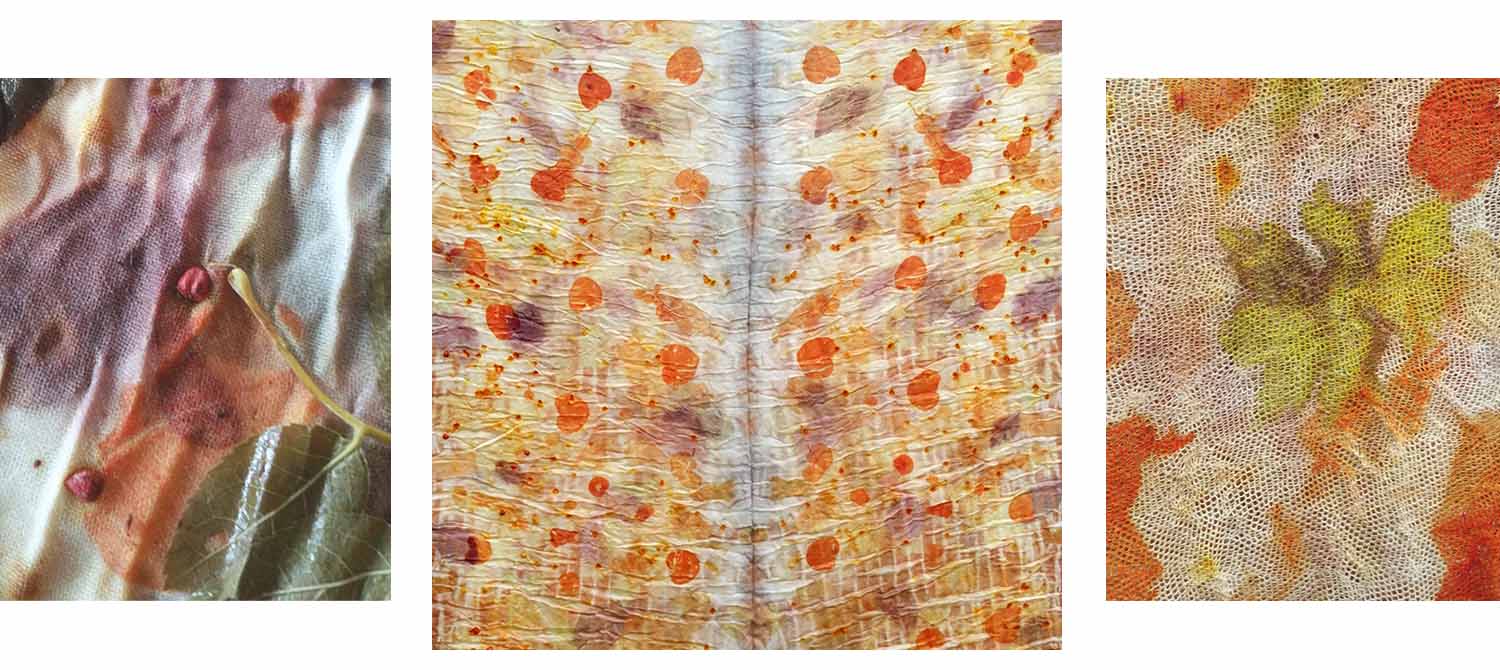
    This is what the viscose crepe looks like after boiling. See the details that you can achieve with ecoprinting.


    Ecoprinting on 70% cotton, 30% silk

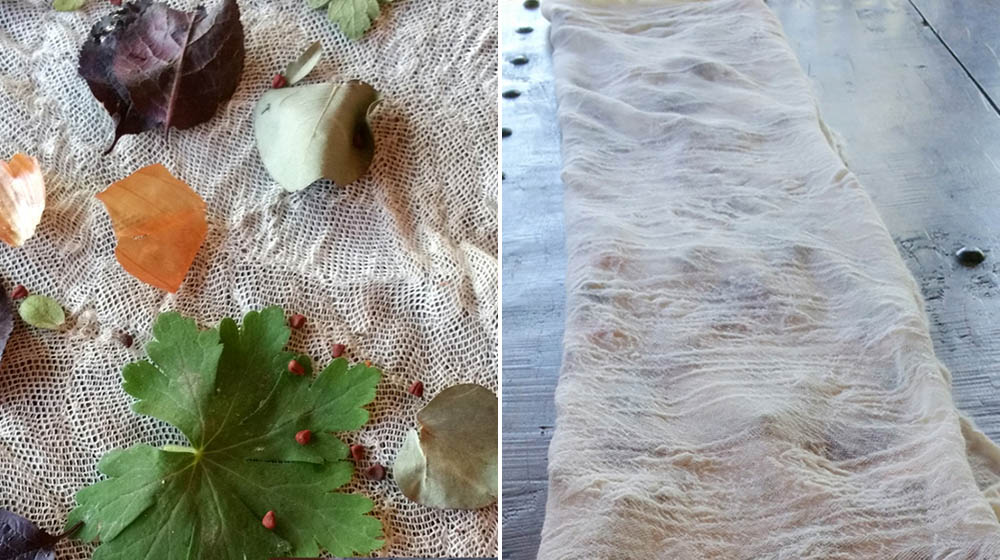
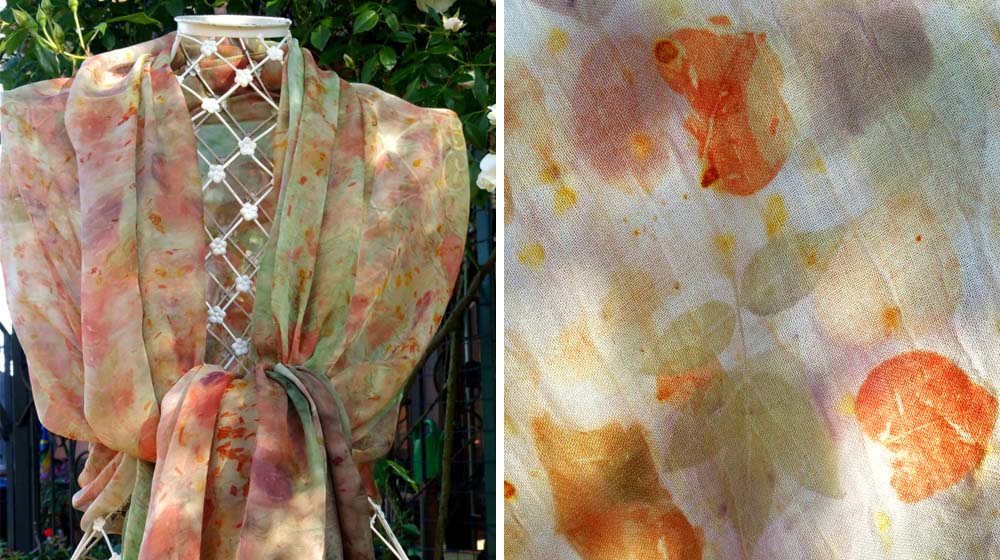
    You can use ecoprinting on voile, too. The first step is to fold your fabric into an accordion fold. Once that’s done, put your leaves into the fold. If you wish to do the same as I did, use fern, rosa rugosa, rumex, cornus and prunus leaves.


    After you have placed the leaves onto the fabric, get an iron rod, and wrap some cotton fabric around it. Be careful not to make any creases. To tie the fabric more easily, fasten both sides with a rubber band, then tie the fabric with some doubled kitchen twine.


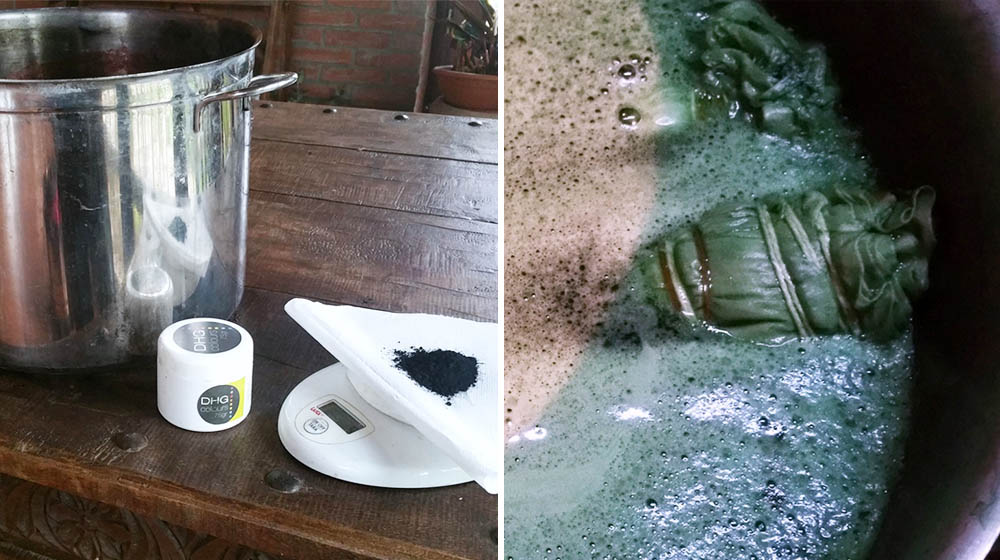
    Prepare a mixture with 4 grams of chlorophyll extract and put it into a pot with approximately 25 liters of water.

    Put the 70% cotton, 30% silk voile roll into the cold water, then bring to a boil and simmer for 45 minutes.


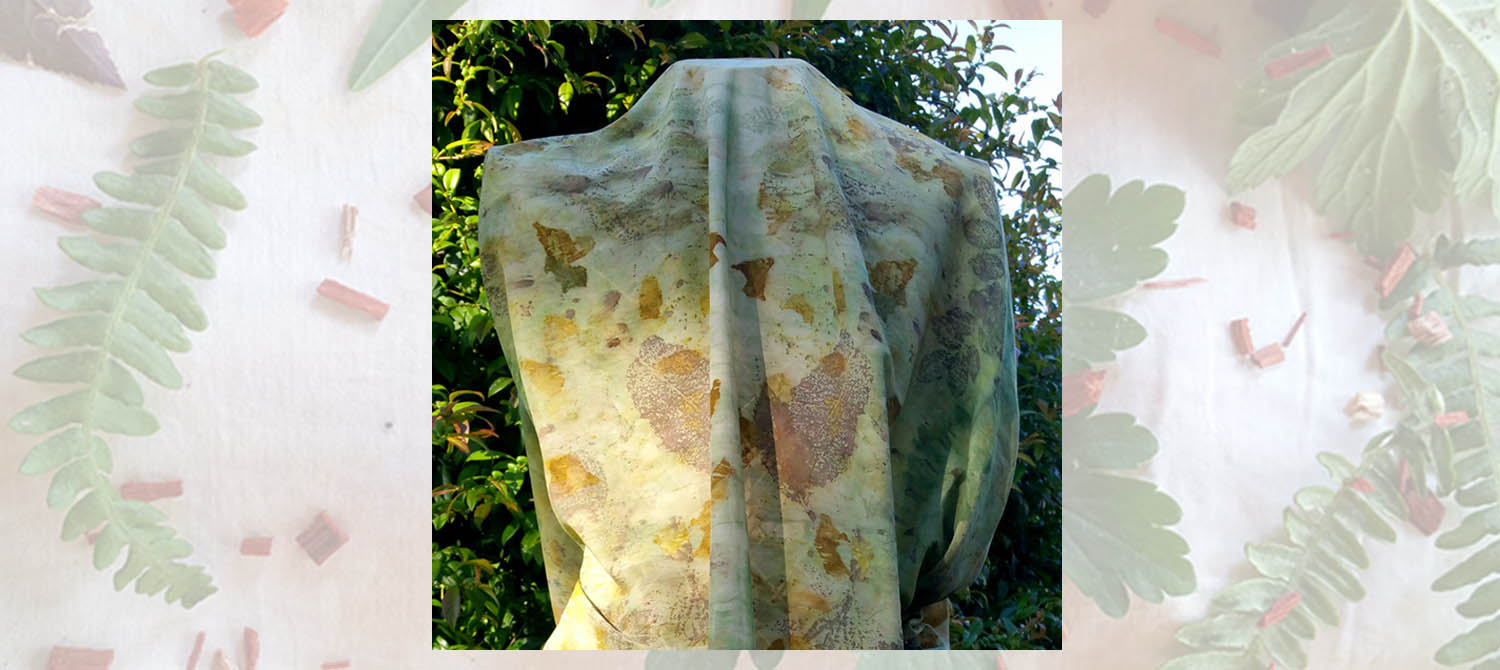
    This is what the 70% cotton, 30% silk voile looks like once you take out of the pot. Look at the amazing detail you can achieve with eocprinting.

    This is the finished fabric. So bright and delicate.


    In this article, Laura Dell’Erba taught you all her secrets to use ecoprinting techniques on fabrics of plant origin. In this other article, Paola Barzanò, a natural dye expert, will teach you 10 golden rules for dyeing.


  • Ecoprinting with Laura Dell’Erba – Silk Chiffon

    Ecoprinting with Laura Dell’Erba – Silk Chiffon

    Ecoprinting on silk chiffon 6

    In this ecoprinting tutorial, Laura Dell’Erba is going to use our Silk Chiffon 6. Some passages are very similar to those that were shown for ecoprinting on fabrics of animal origin, that is Etamine and pure wool Gauze. However, the final result is going to be different.


    If you are interested in an environmentally sustainable fabric, in this other tutorial Laura Dell’Erba ci shows us how to make the most out of ecoprinting techniques with fabrics of plant origin.

    Get your leaves, your chiffon and your pot ready: here we go!


    Steps for ecoprinting on silk chiffon 6

    Before you lay the fabric down on your work surface, don’t forget to wash it thoroughly. Once it is dry, the first step is to fold it into an accordion fold.


    Then, spray some vinegar all over the silk. Open the accordion folded silk in the middle and scatter the leaves all over it. Fold it back and apply a second layer of leaves on top.


    Roll some cotton around an iron rod and place it at the edge of the fabric piece. Tightly roll the silk chiffon 6, being careful not to create any creases.


    Finally, secure the roll on both sides with rubber bands, then tie it with a doubled kitchen twine. This way, the fabric will not move around while you cook it.

    The next step for Ecoprinting on silk chiffon 6 is to prepare a mixture of 4gr. of chlorophyll extract and put it into a pot with at least 25 liters of water.


    Put the silk chiffon 6 roll in the water when it is still cold and boil it. Once it starts boiling, you need to let it cook for 45 minutes.


    In the following pictures you can see the results that you can get with Ecoprinting on silk chiffon 6.


    The result is shiny textile with a delicate, watercolor-like palette. I adore it.

    Let us continue our journey through Ecoprinting with our third and last chapter, the one about fabrics of plant origin.


  • Ecoprinting with Laura Dell’Erba – Fabrics of Animal Origin

    Ecoprinting with Laura Dell’Erba – Fabrics of Animal Origin

    Ecoprinting – Laura Dell’Erba’s Experimentation

    Today’s post is about ecoprinting. That is, a completely natural, zero-impact technique. With ecoprinting, we’ll learn that flowers are not only beautiful but also useful and the same goes for leaves, some rocks and even bones. It is a wonderful, ethical way of making your clothes unique. Those who become interested in this technique, invariably fall in love with it because it is very stimulating. In fact, the interesting part is not only the dyeing process in itself, but also collecting plants and flowers, selecting them, and the idea that you are creating with a process which does not damage the environment. Ecoprinting is a journey which puts us in touch with respect for Nature and therefore for ourselves.

    Who could be a better guide for this new journey than the expert Laura Dell’Erba? Laura has already collaborated with us in previous occasions: here is our interview with her. Once again, she enthusiastically accepted our invitation to experiment with different fabrics, and to compare the results.


    Let’s start with ecoprinting on fabrics of animal origin – specifically, Etamine and Gauze, both pure wool. Laura Dell’Erba has also experimented with ecoprinting on silk chiffon.

    If you wish to find out more about how to use ecoprinting on blended fabrics mixing vegetable and animal fibers, click here.


    Ecoprinting – let’s get started

    Now I’ll leave you to Laura’s words and pictures, which will guide you through ecoprinting on pure wool gauze and etamine.


    The first passage for ecoprinting is to thoroughly wash the fabric. Keep in mind that these types of fabrics do not need a mordanting bath.


    Ecoprinting on wool gauze

    Lay the wool gauze on a work surface, and spray it with a thin, even layer of white vinegar.


    Take whatever leaves you wish to use for your project and scatter them on one half of the fabric. To achieve a similar result to mine, you’ll need eucalyptus, geranium, prunus leaves, as well as some onion skin, bixa orellana seeds or annatto.


    Once you have laid out the leaves, fold the other half of the gauze over them. Then fold once again into a thin strip, trying not to move the leaves around as you do it.


    Then, get an iron rod and roll a cotton cloth around it. This is an extremely important step so that the fabric does not come apart in the future, because fibers tend to become damaged if they rub against the iron directly.

    Place the iron rod on the edge of the wool gauze, then slowly and accurately roll the fabric. Keep it tight so as not to create any creases.


    Once the fabric is completely rolled around the rod, you will need to fasten both sides with rubber bands. This will make it easier for you to tie the whole roll with some doubled kitchen twine.


    Now, start preparing a mixture of water and Cutch Tree extract (4 grams will be enough). Start mixing everything in cold water, using a pot with a capacity of at least 25 liters. Before you turn the heat on, put the wool gauze roll into the water and let it boil for at least 45 minutes.


    These are the results I got with ecoprinting on wool gauze.


    Ecoprinting on pure wool etamine

    Etamine, just like pure wool gauze, needs to be laid out flat on a suitable work surface and sprinkled with vinegar. Fold the fabric in half, and then fold a quarter underneath and a quarter on top. You’ll get an accordion fold.


    When the pure wool etamine has taken this shape, open the accordion in the middle. Scatter the leaves in the quarter that’s closer to you. For this tutorial, I used the same leaves I used for the wool gauze, to which I added some rose leaves.


    Fold the fabric once again like you did at the beginning, and scatter some leaves on this part of the fabric too. Then, take an iron rod and roll a piece of cotton cloth around it. Place the rod on the edge of the etamine and carefully roll it up, being careful not to create any creases.


    Place some rubber bands on the two sides of the roll, then tie it with a doubled kitchen twine.


    Once this is done, you need to prepare a mixture of water and cutch tree extract (approximately 4 grams). Make sure you do this when the water is cold, using a pot with a capacity of at least 25 liters. Put the roll of pure wool etamine into the cold water, and once it starts boiling, let it simmer for at least 45 minutes.


    In the pictures below you can see the unfolded etamine roll, as well as the final results I got with this ecoprinting technique.


  • Workshop Ecoprint! 2.0 – Laura Dell’Erba

    Workshop Ecoprint! 2.0 – Laura Dell’Erba

    TEMA DEL CORSO

    L’ecoprint viene considerato da molti come un’evoluzione della tintura naturale tradizionale. Mentre però in quest’ultima si pone il tessuto opportunamente mordenzato in un decotto di piante o in un bagno di estratti tintori, nel procedimento di ecoprint le piante tintorie (ma anche piante che non lo sono tradizionalmente!) vengono poste direttamente sul tessuto da tingere/stampare.
    In questo corso (che è l’evoluzione di quello già ospitato a Novembre 2016) imparerete le basi della stampa vegetale (è quindi adatto ai principianti) ma affronterete anche nuove tecniche di mordenzatura di seta e lana e sperimenteranno contaminazioni di ecoprint, shibori e tie-dye, oltre che l’uso di alcuni inchiostri di origine vegetale.


    Più nello specifico ecco gli argomenti che affronteremo:

    • accenni generali alla tintura vegetale
    • l’ecoprint come sistema di tintura ecosostenibile
    • preparazione e mordenzatura (anche a freddo) dei tessuti
    • preparazione del bagno di tintura
    • piante tintorie e piante per ecoprint
    • uso dei metalli e dei preparati a base di aceto
    • preparazione dei rotoli di tintura
    • cottura e apertura dei rotoli di tintura
    • variazioni di colore e possibili interventi
    • doppie tinture, tintura di base con estratti e sovrapposizioni
    • asciugatura e lavaggi
    • riciclo dei bagni di tintura
    • come avere cura dei capi e dei tessuti tinti naturalmente
    • contaminazioni tra ecoprint, tie-dye e shibori
    • preparazione e uso inchiostri vegetali da utilizzare sui tessuti ecoprintati

    Data: Venerdì 14, Sabato 15 e Domenica 16 Luglio 2017 (durata 3 giorni)

    Orario: dalle 9.30 alle 16.30 circa , inclusi pausa pranzo e caffè

    Sede del corso: DHG, Via Panconi 15/17 – 59100 Prato

    Numero partecipanti: max. 14 (minimo 5)

    Lingua: Italiano. Per Russo e Inglese possiamo fornire traduttrice – per informazioni e conferma del costo scrivere a [email protected]

    Difficoltà: adatto per tutti i livelli e consigliato ai principianti

    Costo a persona: 290 Euro inclusi 3 pranzi leggeri (light lunch).


    Il corso dovrà essere pagato in anticipo. Le iscrizioni non saranno considerate avvenute fino a che non riceveremo il pagamento a saldo dell’intero importo.

    Se impossibilitati a partecipare la cifra vi verrà rimborsata come segue:

    • Entro 1 mese – 50%
    • Dopo questo termine non è previsto alcun rimborso a meno che DHG non riesca a vendere il posto rimasto libero.

    I materiali necessari, non inclusi nel prezzo del corso, vi verranno comunicati via mail ad iscrizione avvenuta.

    Vitto, alloggio, spese di viaggio e tutto ciò che non è esplicitamente descritto come INCLUSO nel costo del corso sono da considerarsi a carico del partecipante.

    Per informazioni di viaggio, alberghi convenzionati e altre informazioni utili vi preghiamo di visitare l’area apposita.